The Ultimate 2022 Guide to Natural Dyeing
Welcome to All Natural Dyeing!
We’re the only website you need for everything to do with natural dyes.
If you’re just starting out in the world of natural dyeing, then figuring it all out might seem a daunting task. I can assure you it’s not!
It’s easy – and what’s more – it’s fun!
To make life even easier for you we even have the web’s largest directory of dye plants – with more being added every week.
This page is our ultimate step-by-step guide to natural dyeing, so come on in, grab a coffee and make yourself at home!
Not sure where to get started? Check out my 30 day Natural Dyeing Boot Camp! Try It Now
What Are Natural Dyes?
As suggested by the name, natural dyeing firstly involves making dyes from naturally occurring ingredients.
And then secondly using them to impart color to yarn, fabric and other textiles.
 Mother nature’s bounty such as leaves, roots, barks, berries, nuts, funghis and lichens are all good sources of natural dyes – as are minerals and even some insects such as cochineal!
History shows us that for thousands of years people have been making their own dyes to color yarn, fleece, clothing and household textiles.
The techniques used really haven’t changed that much!
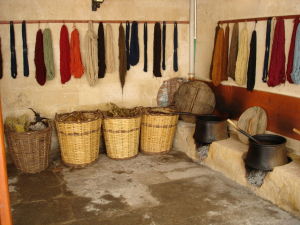
Carpet weavers throughout Turkey still use natural dyes to color the wool spun into yarn and handwoven into the brilliantly patterned carpets that can be seen all over the world.
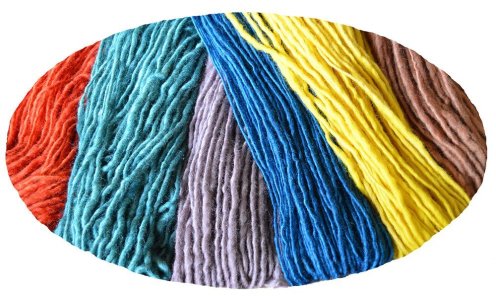
There is something almost magical about using truly organic ingredients that you’ve sourced from the natural environment to make your own dyes. The colors blend effortlessly when you are using them together in a project and everything just ‘looks right’.
How Do I Source Materials For Natural Dyes?
Natural dyeing all starts with finding or purchasing the materials to make your own dye bath. Some of those may be closer than you think!
If you have a backyard with a garden you may even have some at your fingertips right now.
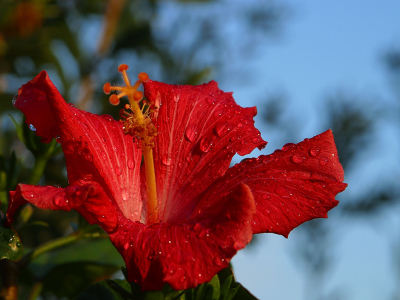
Hibiscus flowers, purple basil, and logwood will all produce red to purple dyes.
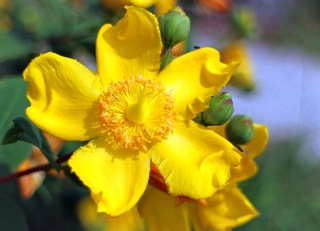
Lichen, turmeric, and pomegranate will give you yellows through to oranges.
The possibilities are endless, as Mother Nature has provided a bounty of beautiful colors for you. The only limit is your imagination!
 Vegetable gardens can be a wealth of colors for your natural dyes. Raspberries, beetroot, carrots, strawberries, fennel and onions – to name but a few – all produce wonderfully colored dyes.
If you are lucky enough to live close to a forest or woodland area you can go hunting for your natural organic dye sources!
Your fibre, yarn or fabric will thank you for it, as you don’t get much more organic than the forest!
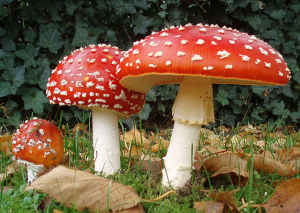
Many fungi are ideal natural sources for dyes. Phaeolus Schweinitzii (commonly known as the Dyers Polypore) is one of the most popular and perhaps easiest to find. It produces a variety of yellow through to gold colored shades.
Another fungi that may begin your natural dyeing journey is Hapalopilus Nidulans (or Tender Nesting Polypore). This is a tan and cream fungi that can be found growing around the base of conifers or hardwoods, in Spring through to Fall. Despite it’s rather pale appearance, this fungi produces breath-taking shades of red and violet in an alkali dye bath.
The forest is awash with color!
Oak galls will produce wonderful shades of grey and black. Acorns and dandelion roots will produce simply lovely brown dyes – like you have never seen before.
Not sure where to get started? Check out my 30 day Natural Dyeing Boot Camp! Try It Now
Ivy and St John’s wort are just another two among all the other wild herbs, weeds and even humble grasses worth watching out for.
 If you are a city dweller and find it difficult to just wander into the woods and frolic around for fungi, you can even buy a range of different dyes online that have already been extracted from natural ingredients. A little dye goes a long way and you won’t have to go through the extraction process which can be time consuming and sometimes difficult – depending on your raw materials.
If you are a knitter, crocheter, spinner or weaver you’ve probably already come across many beautiful hand-dyed yarns or rovings and want to try some natural dyeing for yourself!
Don’t be afraid to experiment by playing with various yarns, plants and mordants to create your own beautiful textiles!
OK, so we’ve covered where to source your raw materials, now let’s look at choosing your textiles.
Choosing Your Textiles
Your options are open when selecting the textiles you wish to dye.
Protein fibres are the easiest option and will take-up the color without argument, provided you follow a few simple techniques.
The first protein fibre you might consider is wool. Explore the various options such as sheep, goat, alpaca, camel, etc.
Hair or fur is another excellent protein fibre. You can use angora rabbits or many other animals.
Lastly, consider the wonderful array of plant fibres, such as cotton, flax, linen and so on!
When choosing a medium to dye, it is best to select a light color. Most natural wools and fibres come in varying shades of white or cream straight off the animal’s back – which is perfect. However, interesting results can also be gained by using tan and light grey fibres.
Not sure where to get started? Check out my 30 day Natural Dyeing Boot Camp! Try It Now
Natural Dyeing Technique #1 – Stove Top Dyeing
Extracting The Dye
A variety of methods can be used to extract dye from raw materials.
Generally the best method is simply to cut up your raw materials into small pieces and boil them!
Place the pieces in a heat proof pot and cover with water. As a rule of thumb use one part raw material to two parts water.
Heat until it is near boiling point (but not actually boiling!) and simmer for approximately an hour.

You will notice the color deepening throughout this process. Leaving the raw material to cool in the pot and soak overnight will give you an even deeper color.
It is worth buying a good book on natural dyeing that details how to extract dye from individual dye stuffs, as some raw materials can be ruined through over heating. You might have a beautiful red color which suddenly turns to a muddy brown because it was left boiling for too long – or even slightly over heated!
Once you are happy with the color of your dye bath, strain the solid materials from the liquid and discard.
Remember, many natural plants are poisonous. It’s a good idea to wear rubber gloves and a face mask. Try not to breath the fumes when heating.
If you have a barbecue, fire pit or camping stove then use them and work outside or in a well ventilated area.
Check with poisons information before proceeding and never use your dye pots or utensils to prepare food.
Adjusting the Acidity and Alkalinity of Your Dye Bath
Knowing a little about the pH of your water will go a long way to obtaining consistent results in your dyeing.
pH neutral water is best for dyeing and can be adjusted to be more alkaline or acidic depending on the color you are trying to achieve.

We recommend buying some pH testing paper, easily obtained from your local pharmacist or dyeing supplier. Simply test your tap water, rain water, tank water or whatever you are going to use. Even rain and ground waters are not pure, as they often have various mineral deposits in them. An alternative is to buy some distilled water from your supermarket, however this is unnecessary.
Once you have established the pH level of your dye bath, you can either raise or lower the pH levels using the following ingredients:
More Acidic
- Lemon Juice
- Citric Acid Crystals
- Cream of Tartar
- White Vinegar
- Rhubarb (boil and use the water)
- Sorrel (boil and use the water)
More Alkaline
- Ammonia
- Lye (Sodium Hydroxide) also known as Caustic Soda
- Baking Soda (Bicarbonate of Soda)
- Washing Soda (Sodium Carbonate)
- Wood Ash
- Lime (Calcium Carbonate)
Preparing the Textiles for Dyeing with a Mordant
OK, now we are onto the exciting part. You’ve chosen your materials and have your dye bath ready. Now, before placing the textiles in the dye bath, you need to prepare them using a mordant.

Note: the subject of mordants and fixatives are covered in more depth on our page all about mordants and fixatives
- Ensure your wool or roving is clean from organic debris
- If using yarn, wind into hanks and tie loosely in a figure 8 style at intervals around the hank to keep from tangling
- Gently submerge the textile in a cool to luke-warm bath of water and soak for 30 mins. Do not stir – or the wool will felt.
- Next, gently squeeze the excess water from the wool and place in a mordant bath.
- Gradually heat the mordant bath until just below simmering point, for 30 mins.
- Leave the wool in the mordant until completely cool. This allows the mordant to adhere to the wool.
- Once completely cool remove the wool and gently squeeze out the excess water being careful not to felt the wool.
- You can either leave the wool to dry and then store for later use, or carry on to the natural dyeing stage.
Using the Dye Bath to Dye Your Textile
And finally, after all that preparation, you’re ready for the ‘big plunge’. You’re going to actually place your textile in the dye bath!

- Take your roving or yarn after the steps above and gently immerse into the cool natural dye bath
- Gently bring the dye pot to a very gentle simmer (you don’t want too much movement) for approximately 30 minutes.
- Very gently move the yarn around in the dye pot a few times to avoid blotchy results.
- Watch for the color intensity you are aiming for and remove the dye pot from the heat once reached.
- Dyed yarn should be allowed to cool slowly in the dye bath. This give the best chance for the item to take up as much color as possible. It is best to avoid large variables in temperature if using a protein fibre eg: plunging from hot water into cold, as this will cause felting.
- Rinse to remove any excess dye, then hang to dry.
Keeping a ‘Dyeing Diary’ is a great way to record your successes and failures at dyeing!
A small snipped of the dyed yarn fixed into the diary beside your notes can be very helpful for your future dying adventures!
Not sure where to get started? Check out my 30 day Natural Dyeing Boot Camp! Try It Now
Natural Dyeing Method #2 – Solar Dyeing
Solar Dyeing is a really cool method for dying at home! It’s a gentler way although you will need plenty of patience for this method!
Solar dyeing is very simple and once your dye bath is set up there is nothing further for you to do but wait.
It’s really not much more complex than putting all the stuff together in a jar and letting the sun do the work!
You will get some very interesting results with this method and it is great for the kids to learn about how the colours are imparted from the raw materials!

The Method
- As with the stove top method, prepare your yarn or fabric with a mordant in order to make it more colorfast.
- Place the yarn or fabric in a large-mouthed jar or lidded plastic bucket.
- Pour in your dye bath until the jar is full,
- Alternatively you can put dyestuff into the water with the textile and top with water. Note: I prefer not to do this with wool yarn as the vegetable matter gets tangled in the fibers.
- Put the lid on and sit out in the sun for a few days and let the magic happen (if you can wait that long)!
You will need to ensure that the dye bath reaches a temperature of 185 degrees which is when the chemical reaction between the plant-based dye stuff and the mineral mordant takes place.
Because you are not moving the textiles whilst they are dyeing, this method usually produces an uneven variegated result. However this is perfect for dyeing wool, as very little felting will take place.
OK, this sounds really cool – where do I learn more?
OK, so we’ve covered the general rules of natural dyeing in this guide, but you want more?
Check out our pages all about Natural Dye Plants. Here we have tons of super detailed, specific information about how to get the best results from specific plants and materials – including how to grow them yourself!
Also don’t miss our complete guide to Natural Dye Colors to find out which plants and minerals produce what colors!
Lastly, if this all sounds too complicated and you want me to hold your hand through the whole thing, try my Natural Dyeing Boot Camp
Not sure where to get started? Check out my 30 day Natural Dyeing Boot Camp! Try It Now